Search This Blog

Monday, August 30, 2021

Why is my screen black and white

 Why is my screen black and white

Quick Steps

Ho to change the color of the screen back to normal:

Open Settings and go to Ease of Access.

Choose Color filters.

On the right, set the “Turn on color filters” switch Off.

Unchecking the box that says: “Allow the shortcut key to toggle the filter on or off.”

Close Settings.

Problem description: Windows 10 is black and white!

While working on your Windows 10 PC, did the screen switch from color to black and white or grayscale, like in the screenshot below? You have no idea what caused this, and restarting Windows 10 does not fix the problem. Also, if you update your video card drivers and settings, nothing changes. All your apps are gray, and the only colors you can see on your display are black, white, and shades of gray.


Your screen is gray with black and white instead of color

Or, on your Windows 10 PC, the screen may look even darker, like in the picture below:


Your screen is black and white instead of color

If you have a recent version of Windows 10 installed, like Windows 10 October 2020 Update, read the next section of this guide. We have the solution to make the color of the screen get back to normal. If you have an old Windows 10 version from 2017 or earlier, scroll down to the last chapter. If you don’t know which Windows 10 version you have, 

The solution: disable Windows 10’s color filters to change the color of the screen back to normal

If you have a newer version of Windows 10, open Settings (Windows + I on your keyboard), and go to Ease of Access.


In Windows 10 Settings, go to Ease of Access

On the left column, choose Color filters. On the right, you see the color filters that are available in Windows 10:

Inverted - reverses the colors and turns most app backgrounds to black

Grayscale - gray becomes the dominant color for all app backgrounds. The image on the screen looks similar to the first screenshot we shared in this guide.

Grayscale inverted - inverts the grayscale filter’s colors and makes most app backgrounds black, as shown in the second screenshot of this guide.


Choose Color filters on the left

On the right side, set the “Turn on color filters” switch Off, while also unchecking the box that says: “Allow the shortcut key to toggle the filter on or off.” This ensures the keyboard shortcut Windows + CTRL + C does not accidentally turn the color filters on, changing the image on the screen - which could be the accident that caused the entire issue.


Friday, August 20, 2021

How to Fix Wrong Time in Windows 10 (Show Correct Time)


How to Fix Wrong Time in Windows 10 (Show Correct Time)

Though most never think of it, time is a complicated thing for computers. If the time is not correct, there are a lot of things that can go wrong and a lot of things that just don’t work. If your Windows system is showing wrong time for whatever reason, here are some simple yet effective steps you can follow to fix the wrong time issue as soon as possible in Windows 10.

Before following the below steps, restart your system. Oftentimes, a simple restart will fix a lot of problems, including incorrect time. Also, the below discussed fixes will work on Windows 7 and Windows 8 too.

1. Check if Windows Time Service is Running

The first and foremost thing you should do is check if the Windows time service is running. If the time service is not running or stopped, Windows may show the wrong time as it cannot update it accurately.

1. First, press Win + R, type services.msc and click on the “Ok” button. You can also search for the same in the start menu.

Services run command

2. In the Services window, scroll all the way down, find “Windows Time” service, right-click on it and select “Properties”.

Fix windows wrong time 01

3. The above action will open the Windows Time properties window. Here, if the service is not running, you will see the “Start” button, click on it. This will start the service. Next, select “Automatic” from the drop-down menu next to “Startup type” and click on the “Apply” and “Ok” buttons to save changes.

Fix windows wrong time 02

4. Restart your system to apply the changes.

2. Sync Time with Internet Time Server in Windows

Windows has a neat little feature that lets you sync the time with the internet from accurate and reliable sources like time.windows.com or time.nist.gov. This feature is enabled by default. As such, as soon as you connect to the internet, Windows will correct the time automatically. Under certain circumstances, this feature might get disabled. If that’s the case, you need to enable the internet time sync feature.

1. Search for Settings in the start menu and open the Settings app. You can also click on the “All Settings” button available in the notification center.

2. In the Settings app, go to “Time & Language -> Region”. On the right panel, find the “Additional date, time & regional settings” link and click on it.

Fix windows wrong time 03

3. The above action will open the control panel window. Here, click on the “Set the time and date” link under Date and Time section.

Fix windows wrong time 04

4. In the Date and Time window, go to the “Internet Time” tab and click on the “Change settings” button.

Fix windows wrong time 05

5. Now, select the “Synchronize with an Internet time server” checkbox, select time.windows.com or time.nist.gov from the dropdown menu and click on the “Update now” button. As soon as you click on the button, the time will be updated. Click on the “Ok” button to save changes.

Fix windows wrong time 06

6. Close all other windows.

3. Check Windows TimeZone Settings

When the timezone is not right, the time will not be correct. Generally, Windows can automatically detect the timezone and set it. However, it can be wrong sometimes or you might’ve changed it unintentionally. Follow these quick steps to change timezone to the proper location in Windows 10.

Change timezone windows 10 03

4. Set Time Manually

If the automatic Windows time is wrong, you can set the time manually too. It is very easy to do.

1. Search for Settings in the start menu and open the Settings app. You can also click on the “All Settings” button available in the notification center.

2. In the Settings app, go to “Time & Language -> Date & Time” page. On the right-panel, toggle the switch under “Set time automatically” to the “Off” position. Next, click on the “Change” button under “Change date and time” section.

Fix windows wrong time 07

3. As soon as you click on the button, another window will open. Here, use the drop-down menus to set the time and date. Once you are satisfied, hit the “Change” button to confirm the changes.

Fix windows wrong time 08

5. Dual-booting with Linux? Add RealTimeIsUniversal DWORD Value to Fix Wrong Time in Windows

If you are dual booting Windows and Linux, then you might want to add the “RealTimeIsUniversal” value to your Registry. This is because Windows and Linux treat time differently.

Windows assumes whatever time your motherboard tells it as the real time. On the other hand, Linux treats the time told by your motherboard as UTC (Greenwich Mean Time) and off-sets it according to your timezone. As you can tell, every time you boot into the other OS, the time will be modified which results in the wrong or incorrect time.

I’ve already covered a detailed guide on how you can fix Windows and Linux showing a different time. Follow that guide and you should be good.

Fix Windows Linux Time Difference - Create Realtimeisuniversal Value

6. Re-sync Windows Time with PowerShell

Under certain circumstances, Windows gets confused and loses time synchronization. In those situations, you can re-sync the time using a simple PowerShell command.

1. Open the start menu, search for “PowerShell”, right click on it and select “Run as Administrator” option. This action will open the PowerShell with admin rights.

Open powershell as admin

2. In the blank PowerShell window, execute the below command. You can simply copy the command and right-click inside the PowerShell window to paste it.

w32tm /resync

As soon as you execute the command, you should see the outputs “Sending resync command to local computer” and “The command completed successfully”. Do keep in mind that if there is no internet connection, the command will not execute successfully.

Fix windows wrong time 09

7. Scan Your System, Could Be Virus or Malware Infection

Certain viruses and malware can change the time without your notice or mess with Windows in such a way that it shows the wrong time. So, if the above methods didn’t fix the Windows wrong time issue, you might want to scan your system for any infection. You can use Windows Defender or third-party antivirus software like Avast or AVG to perform a full system scan (not quick scan). Additionally, also use the Malwarebytes to do a full scan.

Fix windows wrong time 10

Depending on how big your hard disk is and how many files you have, the scan can take a few hours. So, if possible, start the virus scan before you go to sleep. That way, it will be completed before you wake up and you don’t have to lose any productive time. If the scan finds any threats, follow the appropriate steps shown in your antivirus application to clean the system and see if it fixes the issue.

8. Check CMOS Battery

Every computer, even most laptops, has something called CMOS battery on its motherboard. One of the primary functions of this battery is to help the system keep track of the time even when it is turned off. This is the reason why even when you turned off and unplugged the computer for weeks at a time, it can show the correct time after restarting.

Fix windows wrong time 11

If the CMOS battetime ry is faulty, it can no longer help the motherboard keep track of time. As a result, every you start your system you will see the wrong time.

By simply resetting or replacing the CMOS battery, you can solve the wrong time issue. More often than not, your motherboard manual should contain the steps to reset or replace the CMOS battery. If not, there are quite a few YouTube tutorials showing how you can do it yourself. Follow any one of those guides and you should be good.

What is Pen Drive? Definition Functions and Uses


What is Pen Drive? Definition Functions and Uses


Table of Contents

Pen Drives Architecture

Advantages of Pen Drives and USB Flash Drives

Disadvantages of Pen Drives and USB Flash Drives

Famous Manufacturer of Pen Drives

What is Pen Drive Commonly known as a USB flash drive it is a portable device which means it can be easily transferred from one location to another due to its compact design it looks like a pen shape and therefore it is named a pen drive.

The pen drives are used in a wide range in the world they have easily replaced CDs, Floppy Disk due to their huge data storing capacity and faster data transferring speed.


Pen drives and USB flash drives are connected to USB (Universal Serial Bus) Port which is available on computer motherboards they are used without any additional power supply they receive the power directly from the USB port itself and hence are playing a dominant role in the PC world.

What is Pen drive

Pen drives, USB Flash drives, thumb drives come in huge data storage capacity from 2 GB to 128 GB.

The USB Memory Stick comes with different inbuilt features embedded in itself such as a built-in camera, built-in audio, and video playing applications.

These devices enable users to transfer data from one computer to another with ease with no data loss.

The USB Memory Stick and USB flash drives are Plug and play devices i.e. they do not require any additional drives or software and hardware or application to run them they are easily connected to USB 1.0 and USB 2.0 of desktops, laptops, palmtops, and even in small mobile devices which makes their approach more incredible and vast.

Nowadays USB Memory Stick is also used in the form of bootable medium they are widely used in installing an operating systewhere no optical drives are present, they are used in read, write, delete, and updating data inside these devices.

Pen Drives Architecture

The pen drives consist of a small printed circuit board typically in a plastic or metal body, they use a technology name EEPROM (Erasable Programmable Read-only Memory) for read, write, and erasing data It is highly durable solid stage storage.

This Flash memory which saves data and data output is controlled by a crystal oscillator that has 12 MHz clock signals.


Advantages of Pen Drives and USB Flash Drives

As everyone knows how pen drives and USB flash drives are ruling the IT World because of its some brilliant features, it has replaced the conventional devices which were used for a data storage medium.

Below I have tried to mention some of the advantages of pen drives.

Pendrive comes in huge data storing capacity from 64 MB to 128 Gb.

They consist of a compact design which makes them portable.

They are used as bootable mediums.

They have a faster data transferring rate compared to other Computer devices.

They can hold or store data with almost permanent memory and also called secondary storage devices.

Pen drives or USB Flash drives come in a variety of sizes and can be kept in a pocket for easy transportation.

They are not damaged due to scratches like CDs and DVDs.

Disadvantages of Pen Drives and USB Flash Drives

Pendrives | USB Flash drives are so small that they can be easily misplaced.

They are the primary source for spreading Computer viruses and can easily infect another computer if comes in contact if not taken proper precautions such as Scanning with good Antivirus.

Don’t have high storage capacity like hard disk

Famous Manufacturer of Pen Drives

Transcend

Kingston

SanDisk

I-Ball

HP


How to Install a Hard Disk in Computer Desktop PC – Step By Step Guide


How to Install a Hard Disk in Computer Desktop PC – Step By Step Guide

We may at some point notice that our computer is too full of data (and we have to resort to using external hard drives or pen drives to extract data) or that we cannot install applications, games or work with large files for lack Of space.

Maybe it’s the best time to consider purchasing a new internal hard drive. These components allow expanding the storage space of the computer, in many cases, without having to modify anything in the current equipment. We help you do it step by step.

Table of Contents

How are the internal hard drives and where are they located?

How are the internal hard drives and where are they located

Installing an internal hard drive is simple and can be done by any user who dares and has the right tools (which are usually limited to a simple screwdriver).

The current hard disks use a data interface called SATA III, which is capable of reaching a transfer speed of 6Gbps, that is to say, a theoretical limit of about 700 MB/s of data flow.

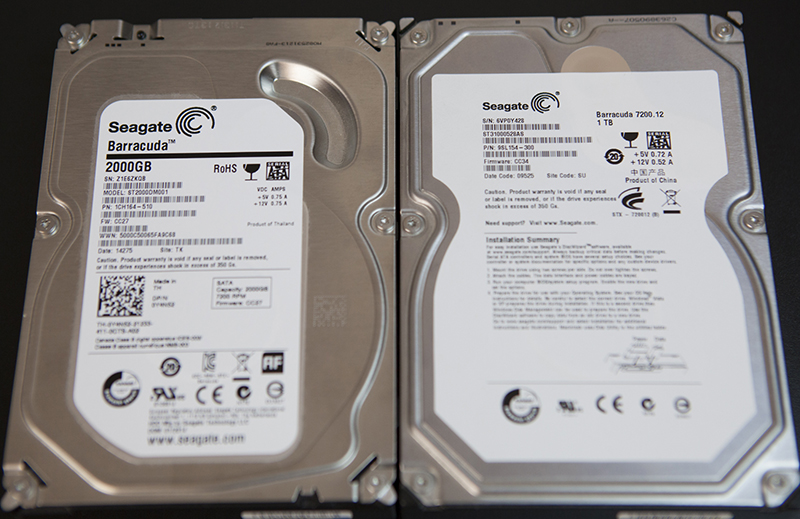
Usually, hard drives have different sizes and different capacities, depending on the equipment where we plan to install it. The most popular hard drives are the mechanics that use magnetic plates to store information, typically 3.5 inches, which currently usually have 1 or 2 TB of storage capacity.

Hard disks of mechanical type

The internal hard drives for laptops are somewhat smaller in size; they remain in 2.5 inches specifically, and, interestingly, they are the same ones that are usually used to make the external hard drives that are so successful now.

The capacity is generally similar to that of larger internal discs, although the price is often somewhat higher than these models.

SSD type hard drive

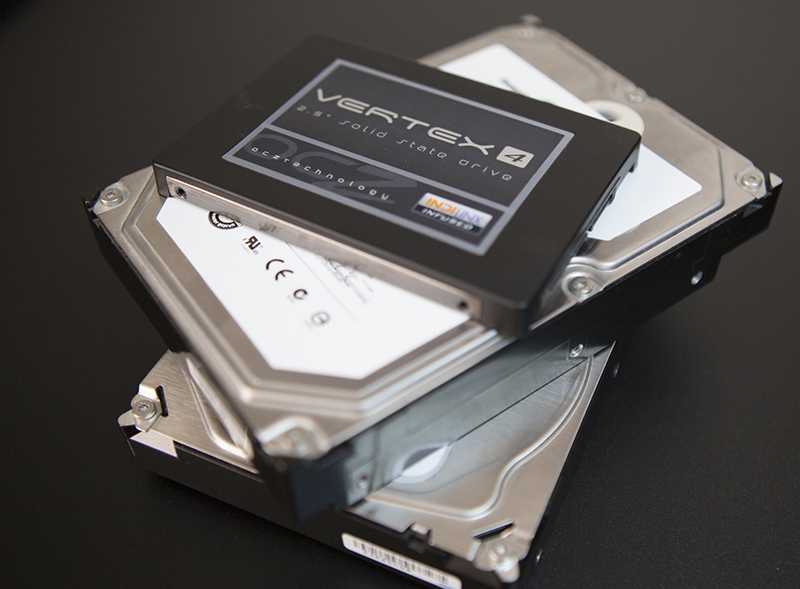
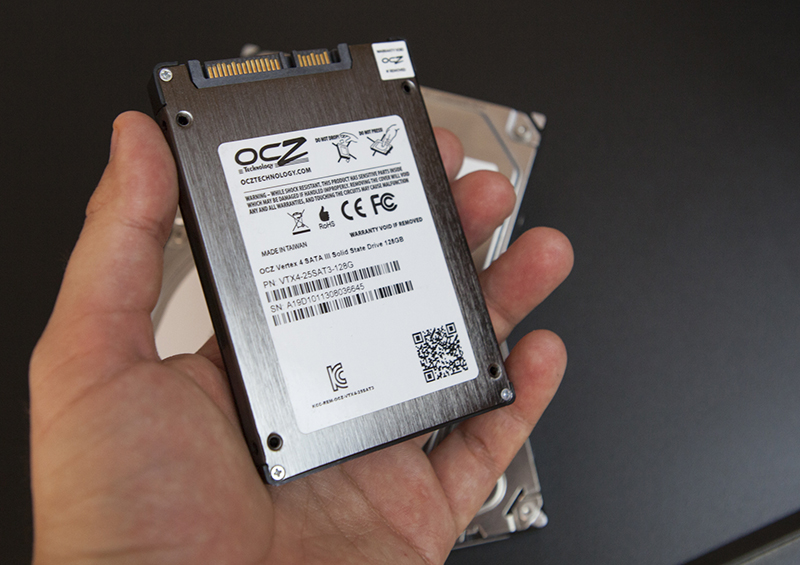
Finally, we find more recent models of hard drives, such as SSD (solid-state drives) or M.2. This type of discs are large pen drives: they do not use mechanical disks inside, but flash memory.

They are much faster than mechanical disks, have a smaller physical size (typically 2.5 inches) and a lower capacity much less than mechanical disks (it is rare to see 1TB SSDs). They are also somewhat more expensive.

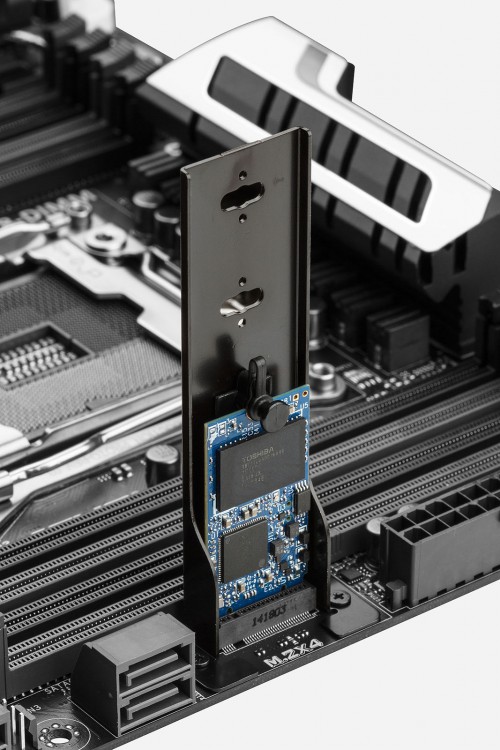
Hard disk type M.2

SSDs can be used both on desktops and laptops thanks to their small size and work with a SATA connector, while M.2 disks, being “memory sticks,” are usually used in new generation laptops or Ultrabooks and have their connector.

There are also hybrid hard drives that, in the same body, include an SSD hard disk and a mechanical hard disk, with the ability to use the SSD disk as the place to dump the main data load (and to make the system more fluid) and the mechanical drive to store most of the remaining data.

Tuesday, August 17, 2021

How to Install a Hard Drive on Your Laptop


How to Install a Hard Drive on Your Laptop

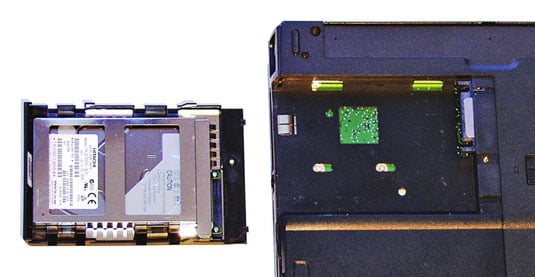
The best laptops make changing a hard drive as easy as swapping a battery. In the below figure you can see one example of a laptop hard drive in a carrier and the empty bay awaiting its installation.

image0.jpg

Turned on its back, you can see how this particular hard disk carrier design holds a drive in a cage; the data and power connectors plug into mating ports in the laptop.

Always remove both the AC adapter and the laptop’s battery before handling any of the laptop’s internal parts. Don’t take the chance of having any electrical power in the laptop that could be shorted out by a tool, screw, or other conducting material.

Follow these basic steps for working with a drive that’s already installed in a carrier designed for your laptop:

  1. Turn off the laptop.

  2. Unplug the AC adapter.

  3. Prepare your work area.

    You want a clean, well-lit, and stable surface. Place a soft cloth or other cushioning material to protect the top of the laptop; you can use almost anything that isn’t metallic or packing an electric charge.

  4. Remove the battery.

  5. Ground yourself before touching the old drive, and again before opening the bag or box that holds the new drive.

    Ground yourself by touching the middle screw on an electrical wall outlet, or by touching a metal pipe.

  6. Locate the hard disk drive compartment or bay.

    Your laptop instruction manual should include a chart showing its position.

  7. Unscrew any locking screws that may be holding the drive in place, or unlatch any catches.

    Set aside the screws in a safe place; make notes on any unusual steps you had to take.

  8. Slide or lift the hard drive out of its bay or compartment.

  9. Reverse the steps to install, latch, and power up the new drive.


Sunday, August 15, 2021

How to install a CPU: Putting the brain into your computer


How to install a CPU: Putting the brain into your computer


You've just got the best processor you could muster and you're ready to toss that bad boy into your first PC build. But, how do you install a processor?

Fortunately, like many other aspects of building a PC, installing a CPU is a very simple process. So, no need to stress about getting it wrong, as we'll guide you through each step.

1. Keep your CPU where it is

Sit tight. Don't take your CPU out of the box just yet.

2. Ready your motherboard

We're not going to assume you're putting your new CPU into a new motherboard, but that would be the simplest scenario. If you have a new motherboard, there may be a plastic cover over the CPU socket. If you're putting your new CPU onto a motherboard that already has a CPU, then obviously that and the CPU cooler will be in the way.

In both cases, you'll need to remove whatever is in the way of the CPU socket. This is also a good opportunity for you to get familiar with the retention arm (and possibly the metal bracket on an Intel socket) that holds the processor in place once installed. You can get a sense of how much pressure it takes to press down.

Keep the retention arm in its open, up position. With your CPU socket open, you're ready to move on.

CPU installation


3. Line up your CPU

(Note: When holding your CPU, it's best practice to only touch the sides. Touching the underside or the metal lid can get undesirable residue on them that may affect performance.)

Your CPU has to go into its socket on the motherboard facing the right direction. Fortunately, there are almost always indicators on the CPU and socket to help you get the alignment correct.

Look for a matching indicator on the corner of your CPU and the socket. It will likely appear as a small triangle. If you don't see any indicator, you should consult the manuals for your motherboard and CPU. 

CPU installation


4. Set the CPU into its socket

Assuming you correctly lined up your CPU with the socket, it should drop right into place. You may need to gently, and we mean gently, shift it around if it feels like it's not quite in place. AMD CPU pins, for instance, can be a little trickier to line up with the holes in the socket.

CPU installation


5. Close the retention arm

With your CPU properly seated in the socket, you should be able to push down the retention arm with ease (if it's an Intel CPU, lower the bracket first). If it feels like the retention arm is resisting you, double-check the seating of the CPU in the socket. We find a gentle push with your pinky finger can be enough force to close the retention arm, so don't try to force it or you may end up damaging your CPU (We've bent CPU pins that way, and it is NOT fun trying to bend them back). 

Once your CPU is seated and the retention arm is down, you're all set. (Note: if you're also setting up the rest of your computer, check to make sure that the CPU power socket on your motherboard is connected to your power supply. It is separate from the larger power connector for the rest of the motherboard.)

Saturday, August 14, 2021

How to install a computer motherboard

 How to install a computer motherboard STEP BY STEP

Installing a motherboard is a complex process. This page provides general steps and guidelines for how to install a motherboard. Please refer to the manual and configuration guide that is included with the motherboard for specific details on installation and configuration steps.

Note

If replacing an existing motherboard in a computer with a new motherboard, you need to first remove the existing motherboard. The steps on this page can be referred to for removing the motherboard, followed in reverse order.

Before getting started

  1. Write down relevant information from the top or bottom of the board, such as the Model Number, Serial Number, and specifications.
  2. Ensure you are familiar with ESD and its potential dangers while working with any circuit board.
  3. When installing a motherboard, turn the computer off and disconnect the power cord from the power supply.

Form factor

Before installing a computer motherboard, make sure the case supports the form factor of your motherboard. Today, the majority of available computer motherboards are either ATX or microATX.

Verify and set jumpers

Computer jumper

Before installing the computer motherboard, make sure all the jumpers or dip switches are correct. The jumpers and dip switches can be changed when the motherboard is installed. However, it is easier to verify them while the motherboard is outside of the case.

Today, motherboards have the jumpers set as auto, allowing either the BIOS or the software to set up the proper settings for the CPU and memory. If the motherboard supports this feature, make sure the jumpers are set to auto. If you want to adjust the settings manually for your peripherals, make sure you are using acceptable settings. Although you can overclock a system, we recommend you use auto or the real values of the system first to make sure the system works before tampering with its settings.

Install pegs or standoffs

Computer motherboard case standout

After checking the jumpers, if pegs or standoffs are not in the chassis, insert these attachments now. These are required to prevent the motherboard from shorting out and must be inserted before installing the motherboard.

When installing the pegs or standoffs make sure to insert them into the proper holes. Many cases support different motherboard form factors, and if not placed in the proper holes, it may cause damage to the motherboard. The holes on the case have a small indication of what uses them. For example, a hole may have the words ATX listed next to it to indicate the hole is for an ATX motherboard.

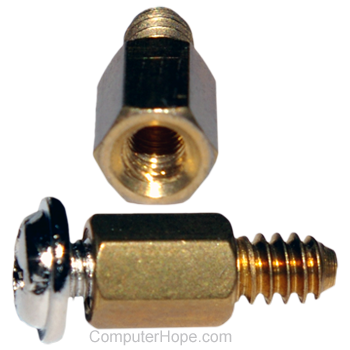
As the standoffs are being installed, make sure they are installed firmly into the case. Doing so helps to prevent issues such as the pegs coming loose when unscrewing the screw from the peg.

Motherboard installation

After the standoffs are attached and the I/O plate is in place, install the motherboard into the case. When doing so, make certain you align the back of the motherboard with the back of the case. As the motherboard is being installed, align the holes in the motherboards with the pegs or standoffs.

Once aligned, begin placing screws into the motherboard that should go into the peg or standoff inserted earlier.

Caution

When screwing in the screw you do not want the screw to be too tight. If tightened too much, it can cause the motherboard to crack. However, the screw should be in enough to hold the motherboard in place.

Install essential components

If not already installed, install the below necessary components into the computer.

Front panel setup

Computer system panel cable and connector

Once the motherboard is physically installed into the computer, the Fpanel (short for front panel connectors) must be connected. This panel controls such things as the power button, reset button, hard drive light, and power light.

Unfortunately, the setup of this panel can be confusing at first, even with the instructions provided from the motherboard manufacturer. Below are steps and additional information and help with connecting the cables to this connector.

  1. This connector consists of a series of two pin connectors.
  2. The cables that connect to the connector are 2, 3 or 4-pin connectors.
  3. The cables usually consist of red, green, blue, white or another color cable with a black cable. The colors on your cable may be different, but the black or darkest cable is the ground, denoted as '-'.
  4. Most cases have a separate cable for each setting, but some computers now have all of these cables as one large connector. If the computer has one large connector, it only connects in one direction. If you're installing a new computer motherboard in an OEM case that uses a large connector, it may not work with your motherboard since it could be proprietary.
  5. Finally, the computer cannot boot if one or more of the cables is not connected correctly. If you cannot turn on the computer or receive no post, check these cables first.

Connect cables

Once the front panel cables are connected, connect the other cables in the below order.

  1. Connect the main motherboard ATX style power cable coming from the power supply to the motherboard.
Note

Connect the cables in the right direction and never force the cable. If improperly connected, it can damage the motherboard. Today, ATX and other motherboard form factors have a keyed power supply connector that allows the cable to connect in only one direction.

  1. Next, connect the IDE/EIDE, SATA, or SCSI cables to the motherboard from the hard drive, CD Drive, floppy drive.
  2. Connect the Molex power cables from the power supply to each of the drives in the computer.

CMOS setup

Once the motherboard is installed and connected to the computer, connect the keyboard, monitor, and power to the computer. Do not connect all of the cables yet in case you encounter problems and need to disconnect all the cables again.

Once the computer boots enter CMOS setup and set all of the values not automatically detected. We recommend you check or set the below values.

  • How to enter the BIOS or CMOS setup.
  1. CPU Settings - make sure the proper CPU speed and voltage is shown or that it is set to auto.
  2. Memory - make sure the memory settings are right, and all memory is detected.
  3. Drives - verify the floppy, hard drive, and CD-ROM drive are all shown.
  4. If onboard video, modem, network, or sound is on your motherboard and you want to them disabled for an expansion card you are installing, disable these devices now.
  5. Check other settings such as the time, date, and COM ports.

Once everything is detected and set up, save the settings, then exit the CMOS setup and reboot the computer.


MOTHERBOARD KO TIK KAISE KARE

  Motherboard ko thik karne ke liye neeche diye gaye steps follow kare: Sabse pehle apne computer ka power cable aur all other cables discon...